Of sawbucks, jigs and angles
We are no longer building saddle trees, but we have two videos about how Western saddles fit horses available on our westernsaddlefit.com website.
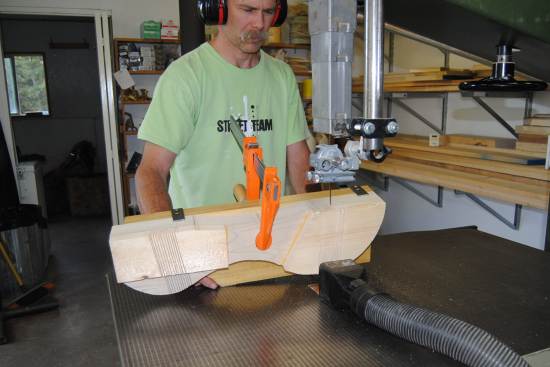
A couple weeks ago Rod finished and used the new jigs he had been working on. Cutting the slots in the back of the bars on sawbuck pack trees has always been a bit of a chore. With these new jigs, now correctly set, things should go a whole lot faster on the next one. Here's some of the process that goes into making a sawbuck pack tree, and how the new jigs fit in.
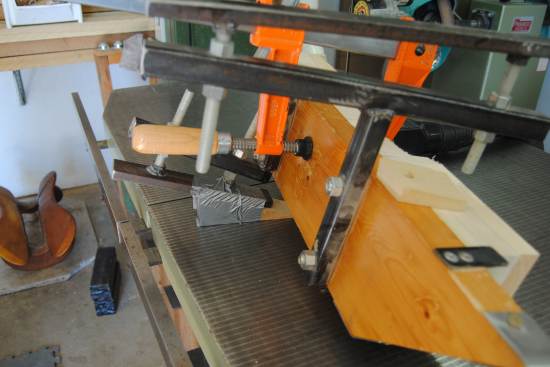
The problem with the slots at the back of a sawbuck bar is that they are at a different angle than anything else we do. So what Rod used to do was set up the bars in one of his other jigs so the back of the bars were where the front of the bars normally went. Then he would mark a line along which he wanted to cut on the top of the bar. Using that line as a guide to line up the band saw blade, he would figure out where precisely the wedge under the jig needed to be set to cut at exactly the right angle, and duct tape it in place. Usually that was a two person job, so these new jigs will be fantastic. (In other words, Rod won't call me out to the shop to help him set things up anymore!!)
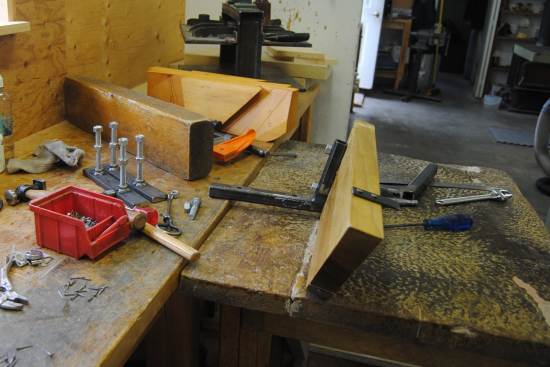
Building the jigs took some time. (Jigs are plural because you need one for each bar.) First was getting the metal, nuts and bolts that we needed. Then getting them welded up at the right angle. (Thanks Gene!!) Cutting, planing, thicknessing and then varnishing the wood was just normal work - for me... Then Rod had to get them all put together, which is what he was working on in this picture.
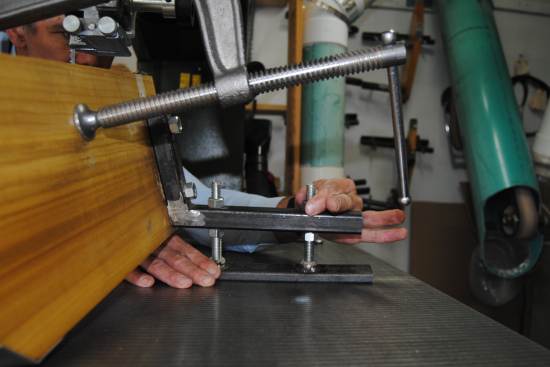
But then there was setting them up so they were exactly right. Getting the angles right on the welding was important, but the fine tuning (in all directions) was done by shifting the nuts up and down, little by little, on the bolts.
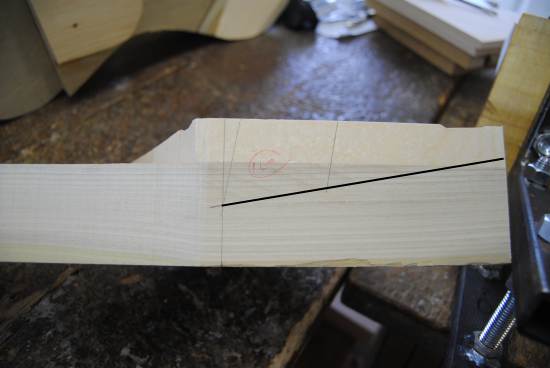
And how did we know how to set it up? Well, that has to do with angles... When marking out the bars, I draw two angled lines on the inside edge of the bar. The more horizontal one is what would normally be the cantle cut on a riding saddle. But when making pack trees, Rod doesn't cut off the top of the bar. He makes slots for the cross pieces to fit into, so he doesn't cut on that line the way he normally does.
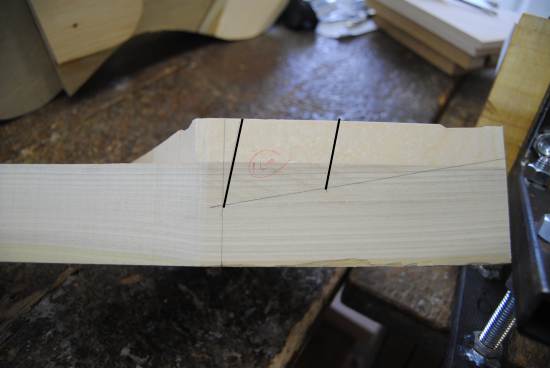
The more vertical one would normally fit with the front of the cantle. But for sawbucks, the angle has to be different to inset the cross pieces correctly. Then there is a second line drawn behind the first. It is measured out to be just a little over the width of the cross piece to allow them to be as tight as possible in the slots, but still get them in OK.
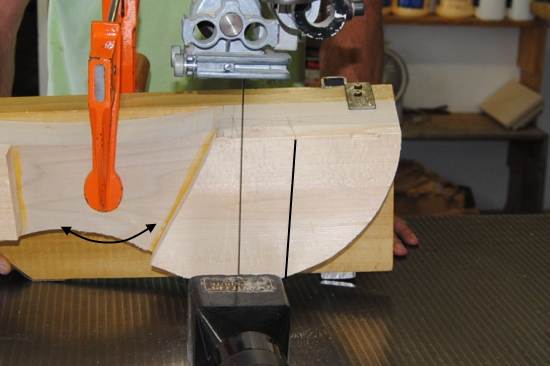
To set up the jigs, Rod then drew another line on the top of the bar. The band saw blade was set to line up with that line. So that was one part of adjusting the jig - getting that angle right (Angle #1) by tilting the bar properly using the jig.
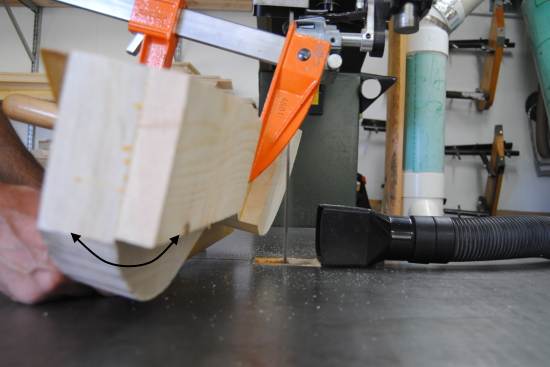
But the jig doesn't just tilt the bar end to end. It also tilts it side to side (Angle #2).
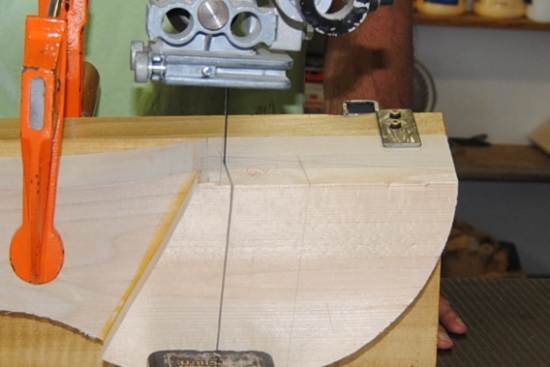
Then when he cuts the slot, he slants the whole jig so he is cutting along the more vertical lines drawn on the inside of the bar (Angle #3). He cuts front and back, and then multiple times in between so he can remove all the wood in that slot.
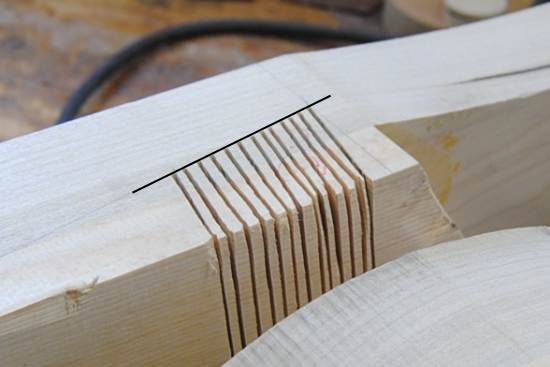
So how deep does he cut? Well, that is where the more horizontal line marked on the inside of the bar comes in (Angle #4). He cuts down to it, and then backs the saw blade out of his cut, then makes another cut next to it. So the bottom of the slot ends up on an angle relative to the top of the bar.
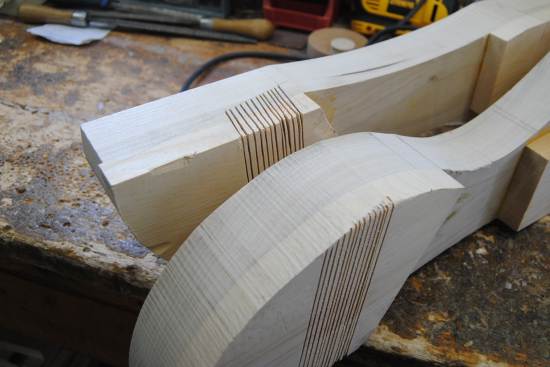
That second dimension set by the jig means the cuts are deeper on the inside of the bar than the outside of the bar.
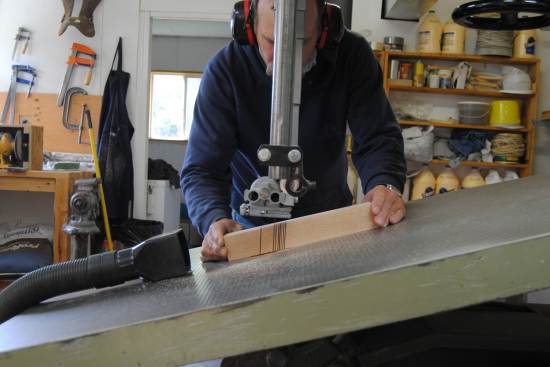
Cutting the slots in the back cross pieces to make them fit together doesn't take a jig as there is only one angle to consider (Angle #5) and Rod sets that by tilting the table on the band saw. The slots in the front are even easier as they are at 90 degrees (Angle #6) so the table isn't even tilted.
 |
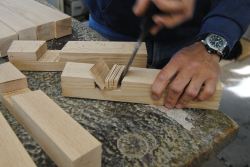 |
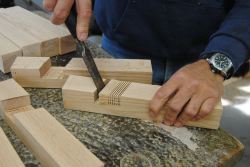
Rod removes all the "slices off wood" from these slots with a chisel, and then rasps the wood to make it smooth.
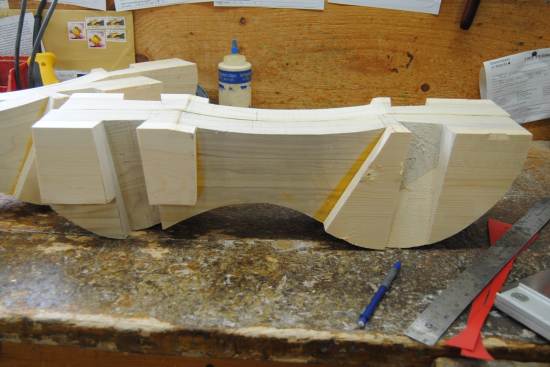
Cleaning out the slots on the bars is done the same way.
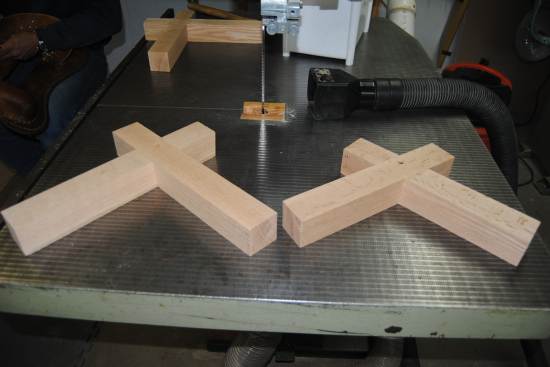
Then the cross pieces are glued and screwed together. (Note the different angles between front and back cross pieces.)
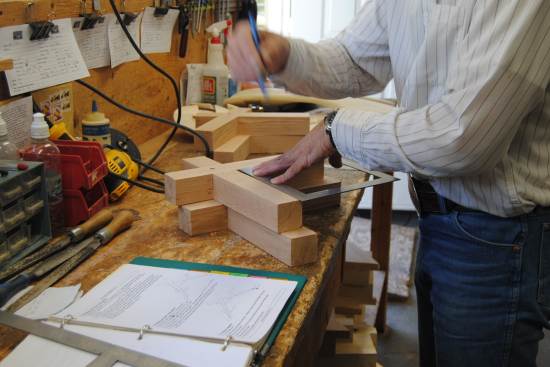
The correct angle to cut the bar surface of the cross pieces is then marked out. The angle marked on the front ones (Angle #7) will set the bar angle for the fit for the horse. The angle marked on the back ones depends on what the bar angle is, but it is different than the one at the front (Angle #8) because the twist needed on the bottom of the bars to fit the horse won't allow as tight an angle at the back as at the front. (And yes, Rod kept records as he figured all this out and eventually made up proper instructions to keep all these angles straight!)
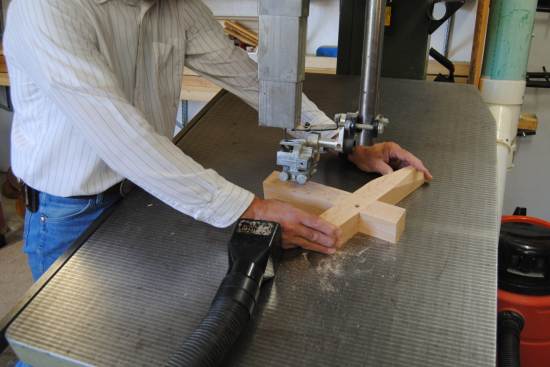
The cross pieces are then cut on these lines, but with the band saw table tilted at different angles for the front and the back (Angles #9 and #10). These angles are different from each other because the cross pieces tilt forward and back at slightly different angles, again due to the twist on the bottom of the bars affecting how the cross pieces can attach.
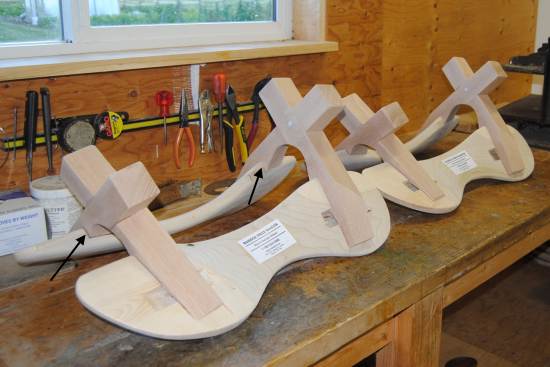
There are many more steps to building a sawbuck (including three coats of varnish before they are shipped out), but this post is about angles. So when you get it all right, both front and back cross pieces fit down into the slots on the bars, being inset more at the inside edge than the outside edge of the bar.
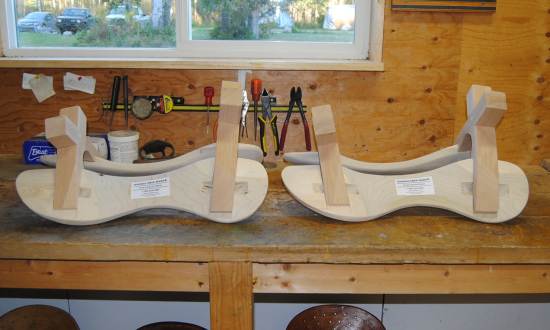
They fit into the slots tightly at angles that work for packing and still give good connection to the bars while allowing for enough twist to fit properly all the way down the back of a horse. This means we can make pack trees that fit horses just as well as riding trees do, and that is worth the extra time and effort we put in to build them this way.
